 By Cemre Ozkurt http://www.deluxepaint.net/ Used tools:
Maya (not necessary), 3dmax, Morph o Magic for max, Photoshop, deepaint, illusion, After Effects, Premiere Introduction: This tutorial won't give you a lot of technical support but it will give you the idea how i did it. I believe that it will help many new people to character creation
maybe this technics are not right but i found them by myself when i was fooling around with animations.
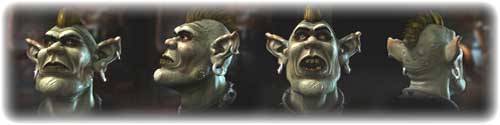
This technics doesn't need to be pass on to the generations.... Concept and Character design :: This character is not a unique one. When i was doing it, i liked it and i finished,
I did drafts before and i saw millions of ORC works (Blizzard, Lord of The Rings Drafts and stuff like that...)
And i didn't need to draw a draft before i started.You can see my old Drafts below (they look like this orc).. Modelling: First I started this model in MAya. I created a box then I created NOSE with cutting and extruding some places. (Thanks Burcak ) 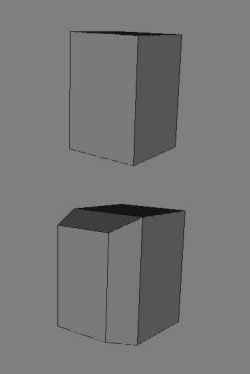 I copied NOSE with Instance and i mirrored it, so if i do something to one side, it happens to the other side.. 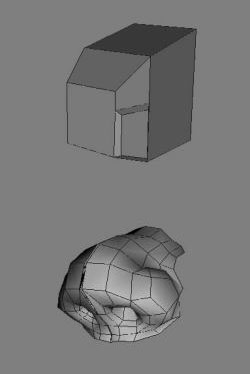 In time, this head poped-out.( I don't Know how did I do that ) than I continued with Instance copy.  First model that i made was not very satisfying to me (middle one) and I didn't touched it like a month.Then i exported the
character to the 3DSmax and i started to play with it. When Can Tuncer was making a scout character texture, I also explored this character.
I took out the Ears from Can's model and i put them into my model.
I changed the ears and Imade them mine. For hair i used alpha map. this technic also use for game character's hair.
It wasn't a satisfying but it finished quick. It didn't look terrible. 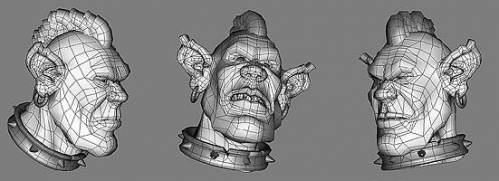 Texture and UV mapping: When i was making the textures, i detached the Ears and head. Then I used multiple Map
1st ID was face and 2nd ID was ears, I gave Spherical UV to the head and I gave to the ears Direct planer map from front.
Then I applied "relax" from MODIFY menu. So it was near to the spherical head.
Then It helped me to paint under nose and eyes easily... 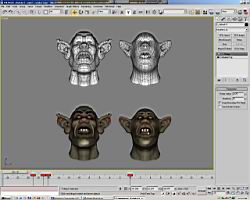 I imported this character to the DeepPaint and I spotted some areas,
Just like under eye wrinkles, Chin point, near Nose Wrinkles, and Forehead wrinkles. I didn't paint he whole thing on DeepPaint.
I marked some areas and I exported map to the photoshop. In Photoshop I opened layers and I did final Texture. 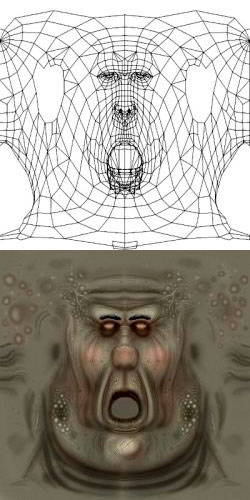 Bump map - Shine map 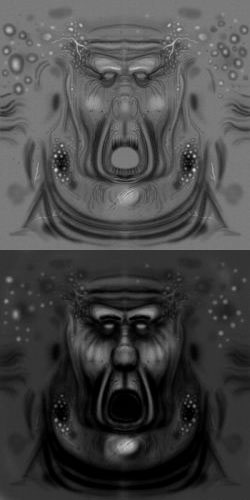 Bone and morph: Character doesn't have body so i din't use any Character Studio or sophisticated Bone system.
I Put 2 bones for only Neck and Head. Then i used Skin Modifier to get whole thing. 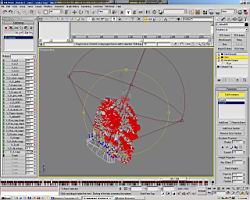 Then I made some expressions for Animation with Morph. Just like A-E-O-MB-TH-L For mouth.
I also made some expressions for eyebrows. Just like Right is up, Left eyebrow is down foranger,
Right eyebrow for sad, All eyebrows are up. After that i used these targets into the Morph o magic. Actually Morph o Magic is basicly the same Morph In standart max
but in Morph o Magic you can make different groups and you can key them separatly.
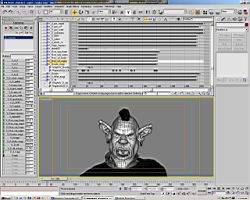
For Example if you work for mouth, you can make a group for mouths and you can key them with only one touch. 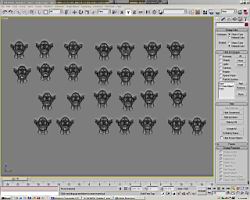 lip-Sync: Actually I thought I made a good job but it was not so good .I used this way to do it.
I put sound under the ViewPort, i watched the Sound waves, I spotted Morph tagets and before 1 or 2 key and i put them. (key them)
Especially MB, FTH, OU, L. These are Important ones. rest of them are in second layer.
First of all, before touching eyes or eyebrows, i put mouth in a sequence with sound. i finished mouths first.
Then I keyyed boned to make head moves.After that muscles and eyelids. After that, I created couple of new morph target for ears and I shaked them...
Actually, its not a best way to do, Bones or flex much better for realistic shaking. But this time I forget the secondary animations on starting point...
Thats why I used Morph for ear animation... I'm not recommended this method.
For Hairs, I Instance copyed the main hair Piece, I bend the main Piece then other Pieces follow it at the same time. 
 Lighting and Rendering: First of all, I tryed the Brazil rendering system for global illumination,Then I try to simulate this lighting.
I created several directional light, and I arrange in a primitive sphere and I rendered couple of time until it was satisfying.
It's really quick simulation for fake global illumination.
After That, I build blue hard light for right side, its a pretty usual sinematic lighting method.
When I was making the upper lights, I pay attention to nose shadow, I like to see this shadow, but not on the lips...
Otherwise it's gonna be strange black area on the important lips.
I also change the eye brightness for correct aspect, Also I change the face brightnes for hard lights.. 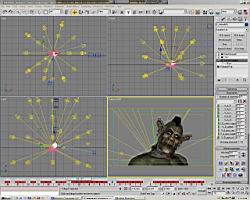 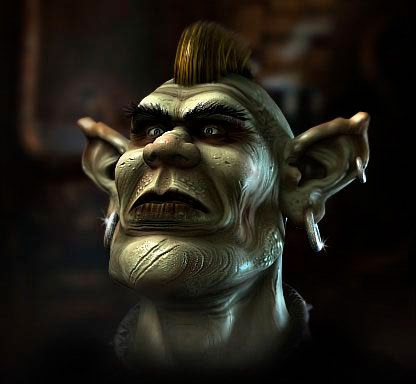
Source: http://www.3dtotal.com/ffa/tutorials/max/viking/main2.asp | 

